Family FunSpot: Glowing Bead Bracelets

Glowing Bead Bracelets
6/23/21
Let’s put the summer sun to work and create these cool bracelets! The special ingredient? UV light-sensitive beads! These energy beads start out white and change color when exposed to sunlight. We found ours on the Steve Spangler Science website (https://bit.ly/3cXzYuA)
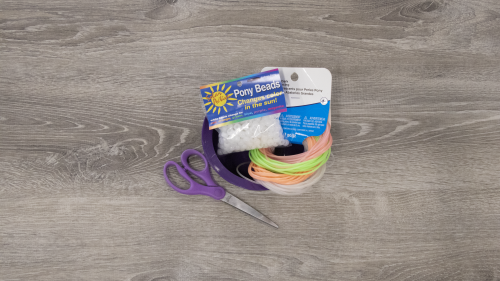
You will need:
- Jewelry elastic, yarn, or string
- Energy beads—UV reactive (https://bit.ly/3cXzYuA)
- A bright sunny day
Instructions:
Pour UV beads into a bowl for easy access.
Cut the length of the elastic thread to fit each child’s wrist
Begin stringing the beads and tie off the ends together to form a bracelet (or necklace)
Bring your bracelet outside on a nice sunny day and watch the colors appear!
Post a photo of your activity to Facebook or Instagram with the hashtags #KQFun #KQFamilyFunSpot and tag us @kidsquestinc!
Sun Paper Art
6/16/21
Create super-cool images with light-sensitive paper and everyday objects. All you need is the special paper and a sunny day!
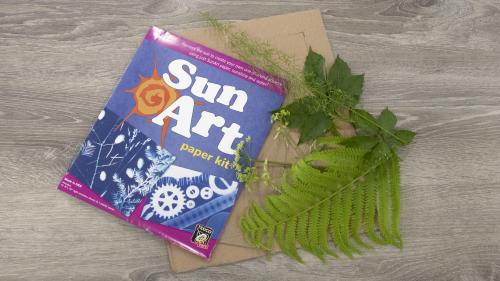
You will need:
- Sun Art Paper (https://amzn.to/3n7ipLk)
- 8×10 Corrugated cardboard
- Leaves, flowers, weeds, feathers, etc.—natural objects
- Acrylic sheet (Included in the Sun Art kit) to keep natural objects in place
- Sunshine
- A water source to rinse off the paper
- Lemon juice (optional)
Before you start:
Take the kids on a nature walk and pick up leaves, flowers, weeds, grasses, and other natural objects to press between the glass/plastic sheet, the sun paper, and cardboard
Choose an indoor or outdoor surface that gets steady prolonged sunlight
Choose what you want to use for your print—flowers, leaves, grass, etc. and set it on your work surface
Have your paper ready, but keep it in the packaging until it’s needed as not to expose it to sunlight before you’re ready
Instructions:
Place a piece of 8×10 inch corrugated on the work surface
Next pull a sheet of paper from its packaging and place it blue side up on the corrugated cardboard
Quickly arrange the leaves, grasses, and flowers on the paper
Place the piece of glass or plexiglass on top of the arranged leaves, grasses, and flowers and leave in the direct sun for 1-5 minutes, or until the paper turns very light blue
Carefully remove the Sun Art paper from layers of cardboard, natural objects, and plex
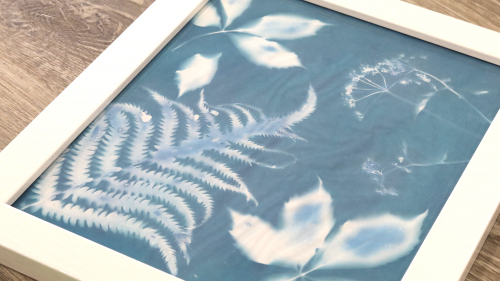
Rinse with water for one minute—to intensify the blue background, add a few drops of lemon juice to a shallow pan and place the paper inside it and rinse again
The blue color will darken as the paper dries
To flatten your print after drying, place it under a few books for a few days before mounting or framing
These prints look so beautiful when framed. We grabbed a frame or two at Michael’s—if you’re lucky you can find them on sale, buy one and get two free!
Post a photo of your activity to Facebook or Instagram with the hashtags #KQFun #KQFamilyFunSpot and tag us @kidsquestinc!
Magnetic Slime
6/9/21
We can’t lie, this is so cool—and easy to do. The only materials that might be a challenge to find are the iron oxide and neodymium magnets, (don’t feel bad, I had to look them up too) so we supplied the links to purchase them.
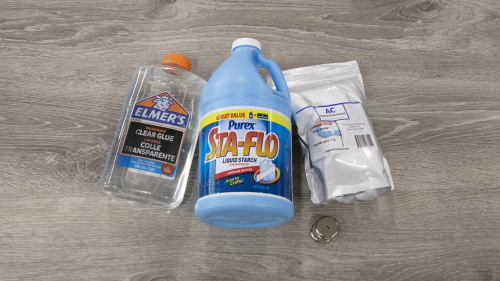
You will need:
- ¼ cup Elmer’s Glue
- ¼ cup Liquid cornstarch
- 2 tablespoons Iron oxide powder (https://amzn.to/3obwkiw)
- Neodymium magnet (https://amzn.to/3t5uxzk)
- Zip-Loc bag
- Mixing bowl
Instructions:
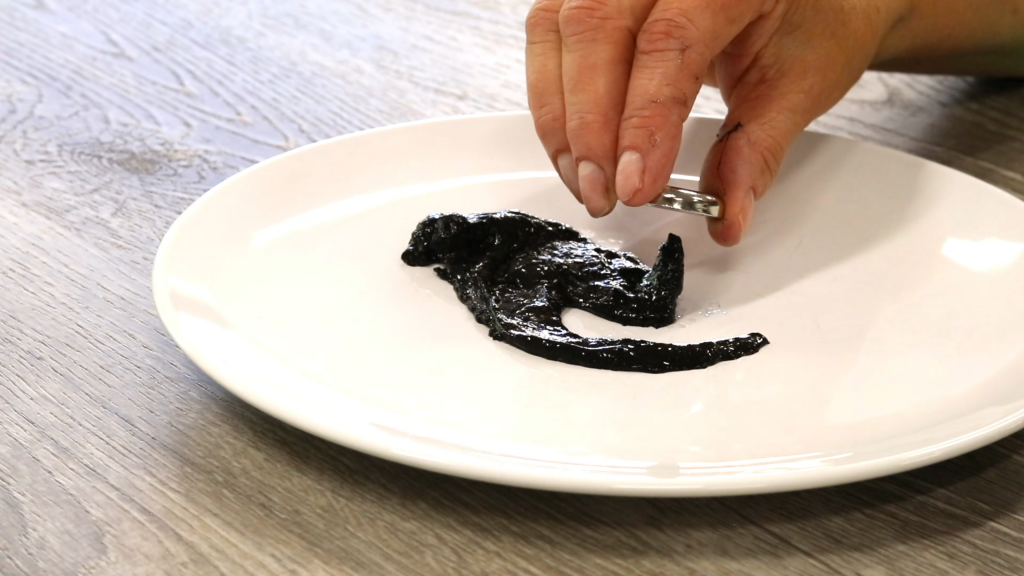
Mix glue and iron oxide powder together
Add the liquid starch—mix and knead until the slime is black
Use the magnet to pull the slime across a flat surface
*Tips—if the slime is too sticky add a little cornstarch, and if it’s too stiff, add some glue. Neodymium magnets work best because they are strong enough to manipulate the slime. The link above sells them in a multi-pack for $9.99, so more than one child can enjoy the activity.
Post a photo of your activity to Facebook or Instagram with the hashtags #KQFun #KQFamilyFunSpot and tag us @kidsquestinc!