Family FunSpot: Crunchy Pasta Snacks
Crunchy Pasta Snacks
12/29/21
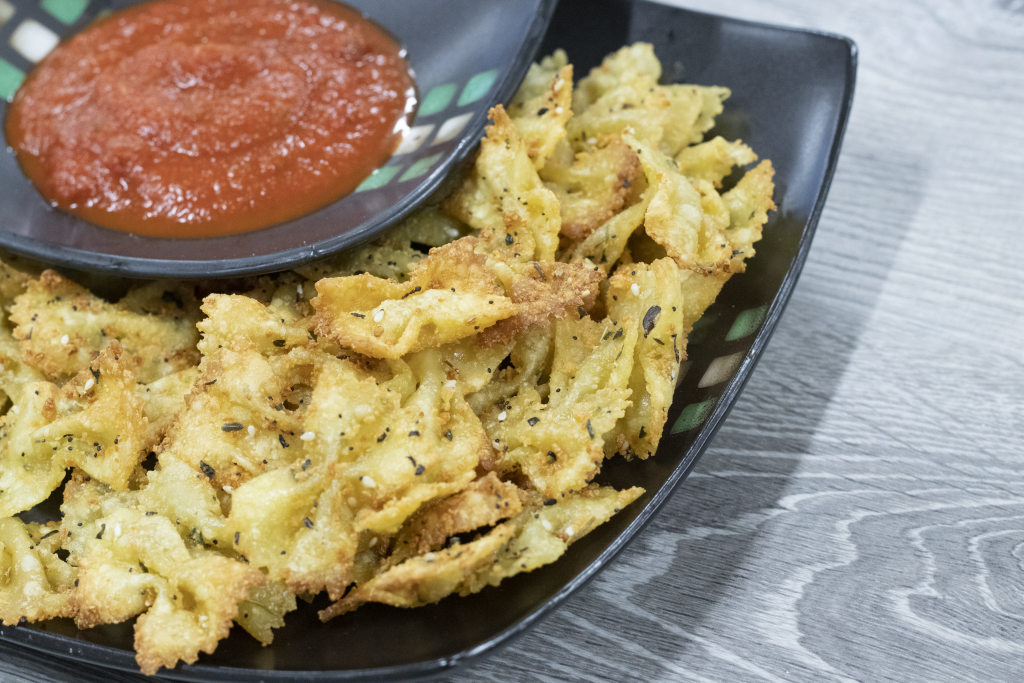
Welcome 2022 with these air-fried pasta snacks—the alfredo and marinara dipping sauces make them irresistible! Be sure to make enough of these tasty treats–they’ll go fast!
Ingredients:
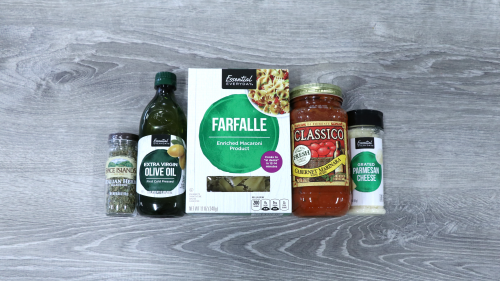
- Bow tie pasta – cooked al dente
- ¼ cup olive oil
- 1 tsp garlic powder
- ½ teaspoon oregano
- ¼ cup grated parmesan cheese
- Seasoned salt and pepper
- Air fryer or oven*
- Pot to boil pasta
- Colander
- Paper towels to dry pasta
- Marinara sauce
- Small serving bowl dipping sauce
Instructions:
Cook pasta according to box directions for al dente (firm) texture
Remove pasta from pot, drain with a colander, blotting with a paper towel until the pasta is dry
Lightly toss the pasta in olive oil, parmesan cheese, garlic powder, and spices
Place in the air fryer at 350 degrees for 18-30 minutes—stirring on occasion until golden brown
Remove from the air fryer and place into a bowl lined with a paper towel
Let cool slightly, blot excess oil from pasta pieces, and transfer to a serving bowl
Spoon sauces into small bowls and warm in the microwave for one minute
Serve fried pasta with dipping sauces, stand back, and collect the compliments! You can experiment with other delicious dips like curry-flavored sauce, beer cheese, or jalapeno queso for a Mexican twist.
*If you don’t own an air fryer you can make this snack on a cookie sheet and increase the cooking time to 40 minutes. Stir frequently to get a nice golden-brown color and crunch.
Post a photo of your activity to Facebook or Instagram with the hashtags #KQFun #KQFamilyFunSpot and tag us @kidsquestinc!
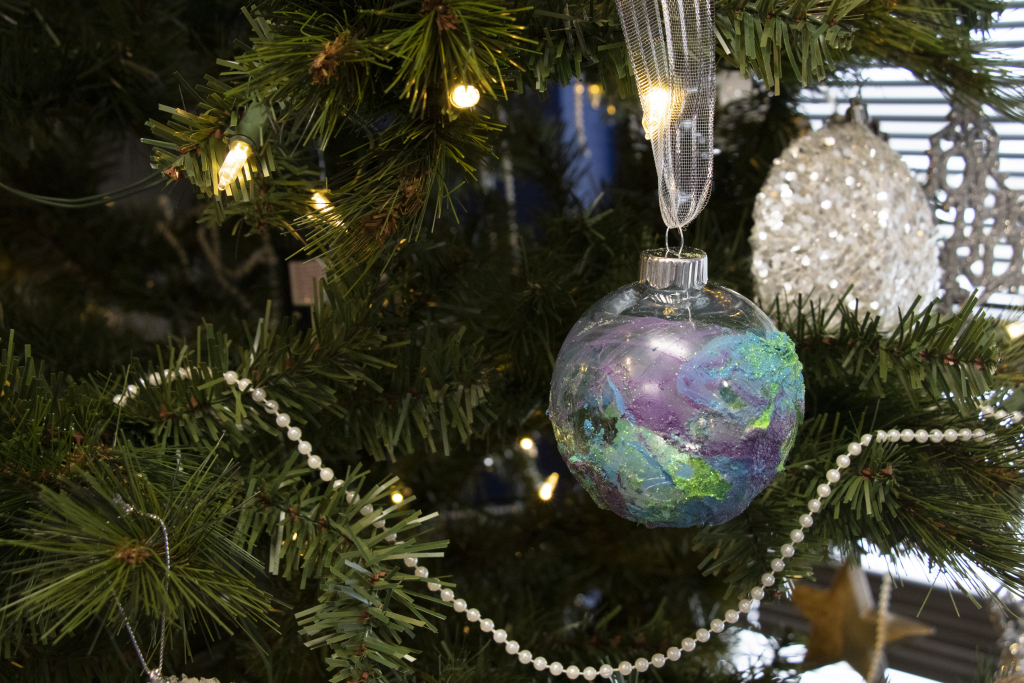
Marbled Spray Paint Ornament
12/22/21
These ornaments are so beautiful and so easy that even the kids can make them. You can choose from a wide variety of spray paint colors and dress them up by choosing to add metallic paints. Invest in some nice ribbon for hanging these beauties, and you’ll have a wonderful one-of-a-kind holiday gift. Just a head’s up: do this craft in a well-ventilated area as the spray paint is smelly! As a precaution, I use a fan as well to move the fumes away from the workspace—it also helps the ornaments dry faster.
You will need:
- Spray paint
- Large plastic bowl or container from the dollar store
- Water
- Wooden craft sticks
- Plastic gloves
- Portable fan
- Egg carton
- Clear plastic ornaments
- Decorative ribbon
- Glitter (optional)
Instructions:
Fill your plastic container about halfway full with water
Remove the metal caps from ornaments and place a wooden craft stick in the ornament
Spray layers of color on the water and glitter (optional)—it will sit on top and marble together
Place a gloved finger inside the ornament and gently dip it into the water pulling the layers of paint against it, dunking it, and pulling it out—the paint will adhere to the glass
Let it air dry for a few minutes before carefully pulling your finger out of the ornament top and placing it in the egg carton so it can be cradled while it finishes drying
Once dry to the touch, replace the ornament cap and thread a ribbon into the loop, and tie
Hang your masterpiece on the tree, set it in a tabletop bowl, or box it up as a gift
Post a photo of your activity to Facebook or Instagram with the hashtags #KQFun #KQFamilyFunSpot and tag us @kidsquestinc!
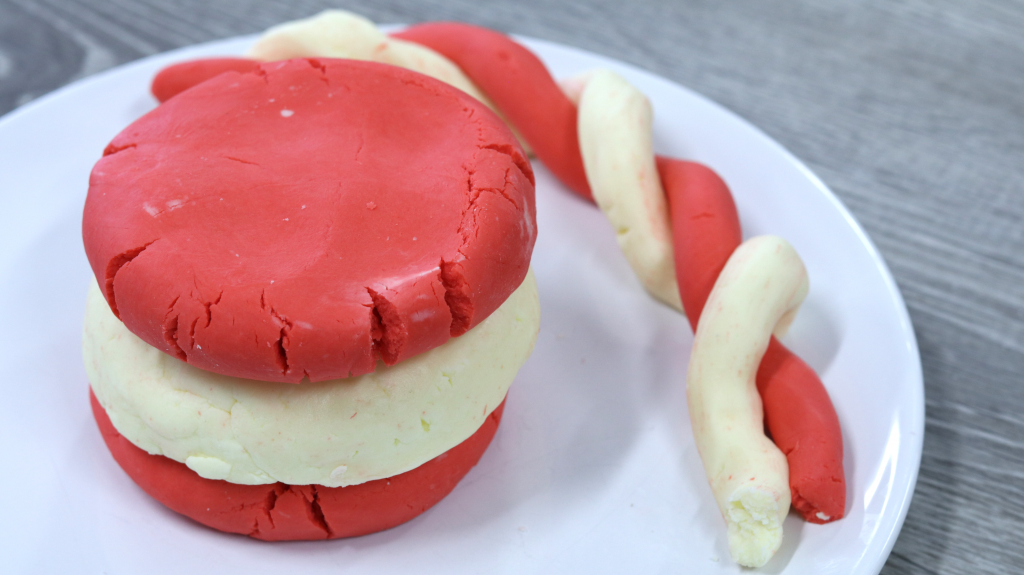
Candy Cane Clay
12/15/21
Besides smelling heavenly, this play dough is actually edible! This is a fun activity when you have a house-full of guests with children. You can make it ahead and then divide it up for play on a snowy day.
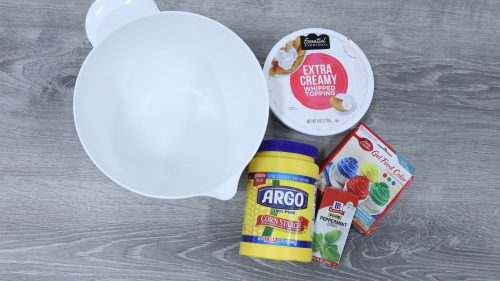
You will need:
- 1 8-ounce tub of whipped topping
- 2 cups cornstarch
- 1 Tbsp vegetable oil
- 1 Tbsp Peppermint Extract
- 10-15 drops red or green food coloring
- Mixing bowl
- Spoon/spatula
- Ziploc bags
Instructions:
Mix whipped topping and food coloring
Add Cornstarch
Cornstarch together-the mixture will be crumbly
Add the and peppermint extract and vegetable oil
Color only half of the dough red or green and leave the other half white
Roll pieces into a peppermint spiral and let the kids enjoy-store in a Ziploc bag air-tight jar
Lasts about 1 week in the fridge
Post a photo of your activity to Facebook or Instagram with the hashtags #KQFun #KQFamilyFunSpot and tag us @kidsquestinc!

Tealight Snowman
12/8/21
I love a great dollar store craft—they’re fun, inexpensive, and always clever! Light up the season with these tealight-inspired snowmen!
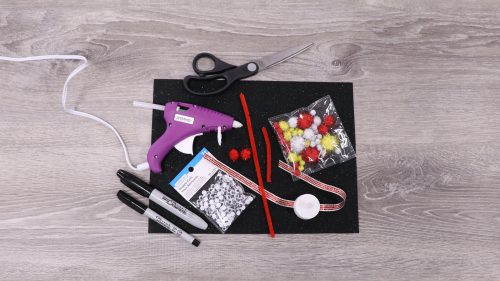
You will need:
- Battery-operated tealights
- Sharpie permanent marker
- Googly eyes
- Pipe cleaners
- Mini pom poms
- Black felt
- 1/8” Holiday ribbon
- 1/4” Holiday ribbon
- Hot glue gun
- Scissors
Instructions:
Use hot glue gun to glue on googly eyes
Create mouth with the sharpie marker
Use a 3” piece of the 1/4″ holiday ribbon to make a scarf
Cut a 21/2” piece of pipe cleaner and glue it to the top of the tealight for earmuffs
Glue a pom-pom on each side of the pipe cleaner
Cut a rectangle 11/2” by 1″ out of the felt
Cut a 11/2” piece of the 1/8” holiday ribbon for the brim of a top hat
Glue the ribbon onto the top hat and then the top hat onto the snowman
Trim up the ribbon scarf
Post a photo of your activity to Facebook or Instagram with the hashtags #KQFun #KQFamilyFunSpot and tag us @kidsquestinc!